Showing posts with label new skills. Show all posts

Saturday, January 21, 2017

#57 - German Pretzels and my Baking Challenge

Waiting for the water to boil with the German Pretzels
 I've tried a new baking recipe each of the first two weekends this year, and plan to do at least one this weekend as well.  It seemed perfect to start the first recipe for my baking project with German Soft Pretzels since they were already on my DayZero list.  I had decided to make pretzels that used a baking soda bath rather than the strictly traditional lye.  After some searching on the internet, I found a good recipe candidate here.

Pretzels just out of the oven
I had made bagels in the past, so I did have some idea of how to approach the boil, then bake method.  However, I decided to stick strictly with the proofing times provided in the recipe instead of following my instincts.  This was probably a mistake as my kitchen (and house in general) is normally cooler than many people prefer.  I didn't get the best rise, but I did get a lesson in trusting your gut when deciding when something is ready.  Shaping the pretzels was more difficult than I expected; the dough did not want to cooperate with being rolled into ropes (probably due to the too-short proof) and my lengths were on the short side - less material to turn into the traditional knots.  I was VERY happy that I did follow the recipe's advice to stand back as I added the baking soda to the boiling water - I had a mini volcano for a short time that did make me worry if I would have anything left in the stockpot to boil the pretzels.

I thought the taste of the finished product was good; however, this is a recipe that I want to revisit and try to work out some of the kinks in the future.
Starting the soda bread

My second new baked good was Irish Soda Bread.  I've made soda bread before in my bread machine but never from scratch.  I choose a plain recipe from a cookbook that I generally have good results on new recipes.  This was a fairly straight-forward bake; the only wobble was that I didn't have quite enough all-purpose flour in my container when I started.  I did have more all-purpose in the freezer, but didn't want to add it in since (as referenced above) my kitchen tends to be cold already.  So, I changed proportions slightly to include more bread flour.  The end result had a bit more fiber, tasted fine, and smelled lovely as I took it from the oven.
I have heard that deeply scoring soda bread helps the bake

Warm soda bread dusted with flour


Sunday, May 5, 2013

#81 - Bagels

I have been baking since I was old enough to help my mom roll out cookie dough and shape bread rolls.  However, my first real experience with bagels didn't happen until I was in graduate school.  I was working in a small editorial office for a major medical journal as the lone student intern, and the office manager would bring in fresh bagels once a week or so from the local Bruegger's bakery.  They tasted great, but the whole boil and bake method sounded a little odd to me.  So, I never tried to make them on my own and sort of forgot that good bagels existed after I moved on to the next stage of my life.
boiling bagels with some draining in the background

Then, a few years ago, my friend Amanda gave me some bagels that she had made - wow! ... yummy and chewy just like I remembered!  And I got the recipe from her to try myself ... but, again, I was just mentally thrown by the fact that you boil them before they went in the oven.  I'm not sure why this was such a mental block for me as I've made doughnuts many times and used to help my mom make other fried cookies like rosettes.  Plus, I've made cookies and bars where part of the ingredients needed to be cooked before adding them to the dough.  Regardless, the recipe just sat in my file.  And, since I'm not fond of commercial bread products, I basically just didn't eat bagels for several more years.
pre-boiled and ready to go into the oven

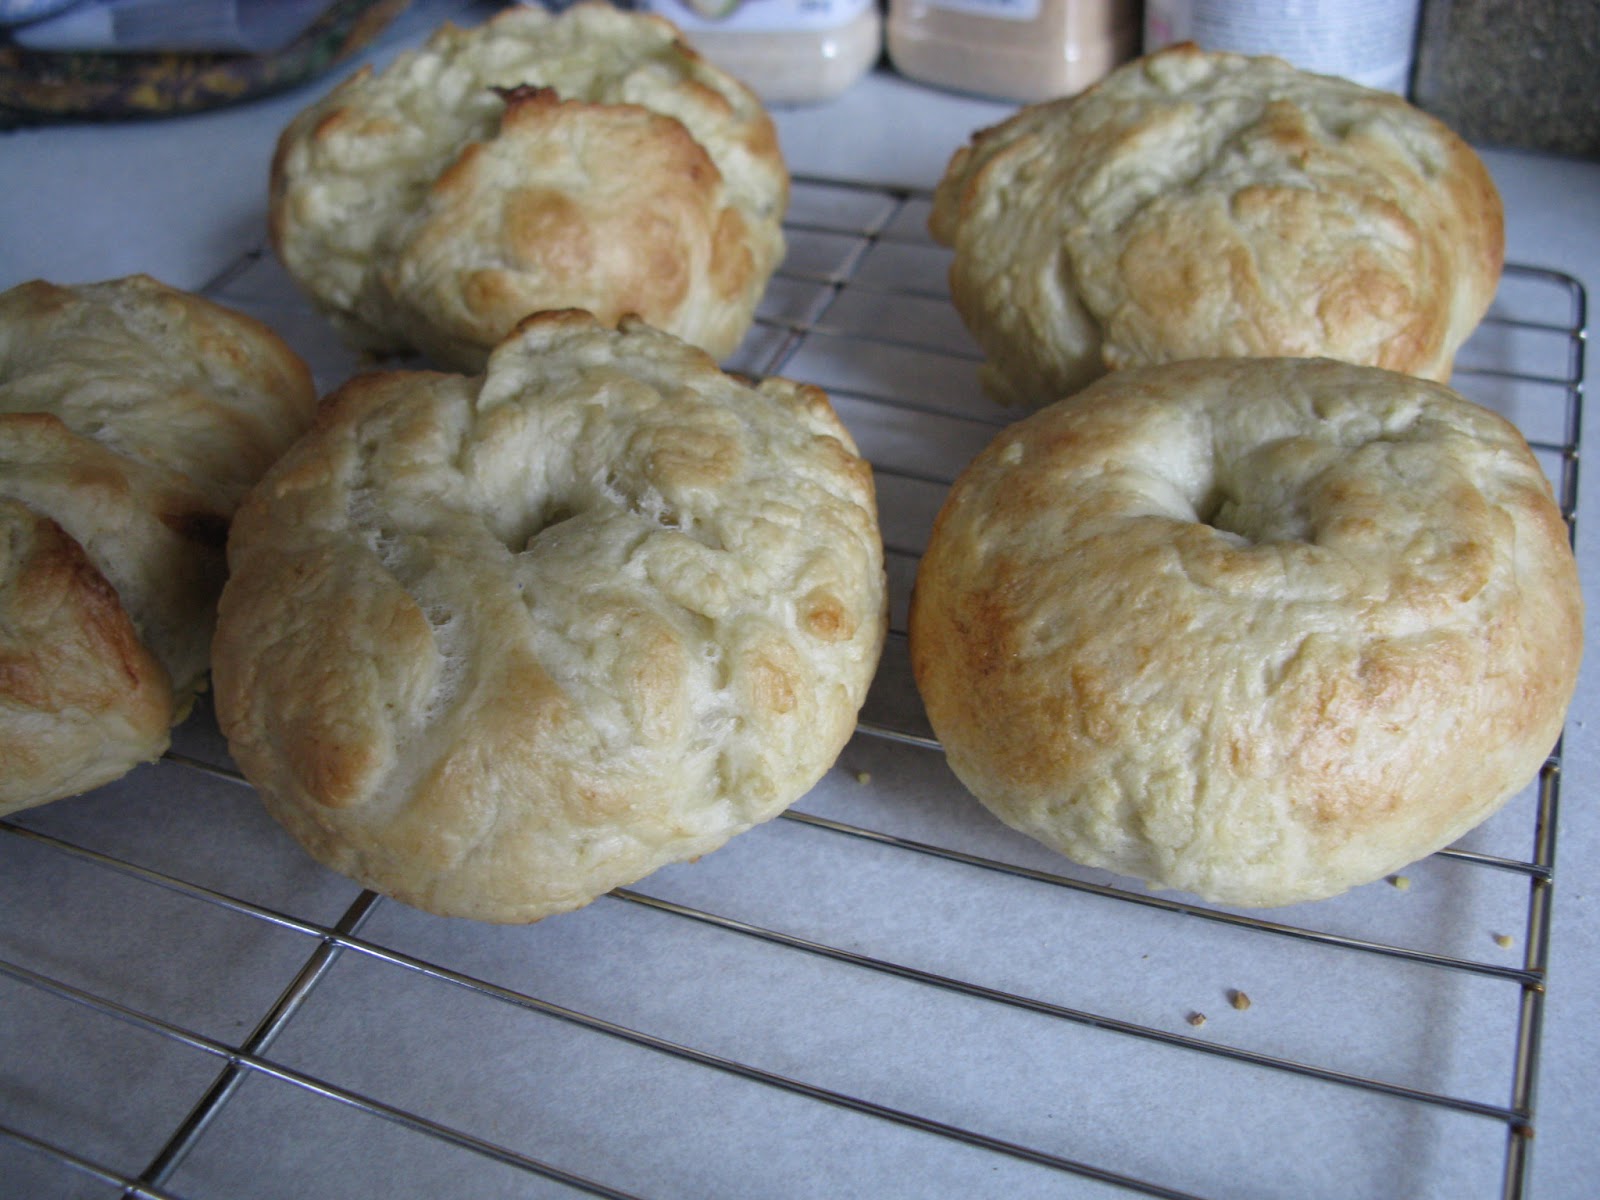
Today, I found the recipe again.  (And heaved a sigh of relief that it didn't require eggs since I was hoping not to have to go to the store).  Actually, I was fairly surprised at how simple it was ... water, sugar, salt, flour, more yeast than usual for bread, and a little bit of corn meal to bake them on.  There was an optional suggestion of malt syrup to make the browning color more appealing, but I left that out since I didn't have any on hand.  My bread machine did all of the work with the dough, and the boiling stage was very quick.  I was amazed ... bagels within half an hour of the dough cycle finishing in the bread machine.  Yummy, chewy, hot-from-the-oven bagels ... excuse me, I think I need to go have another one. ;)
out of the oven and cooling

Saturday, March 30, 2013

#95 - Jewelry

In my house, there is an entire room that I have designated as "the craft room".  It's full of tubs of fabric, beads, rubber stamps, and many other supplies that I rarely have time to use.  I have even been accused by one of my friends of buying craft supplies just so I can organize them later ... sadly, there is a small amount of truth to that statement.  My problem seems to be that I get excited about trying a new craft skill, buy the tools and supplies, make several projects, and then get excited about a different craft ... which requires a new set of tools and supplies.  Although it is wonderful to think "I need a piece of blue ribbon" and know that I can go upstairs and select from a couple dozen types that might work for what I have in mind, it also tends to lead to a cluttered craft room.  I find myself having stern discussions with my inner shopper in large craft stores about moderation.  So, this goal was my very small attempt at using some supplies for a craft that I enjoy- simple jewelry design - and make some giftable or personal items for myself at the same time.

Here's what I made ...
Three sisters bracelets
This set of three bracelets was meant from the start for myself and my two sisters.  The one on the left is Diana's, the center one was for Janet, and the right one I kept.  I bought some of the components at a bead shop in London; I had asked my family for ideas for gifts I might buy them while I was there and one of my sisters asked for beads.  Unfortunately, I couldn't remember which sister by the time I returned plus I had gotten something else for each of them.  So, the beads sat for almost a year while I tried to decide who to give them to.  Finally, I decided to give some of the beads to each of them and use the rest to make a set of similar bracelets for all three of us - that solved my dilemma to everyone's satisfaction.

The chainmaille experiment
This pendant was my attempt at chainmaille jewelry.  My nephew and his girlfriend have a small company - coldfirecustoms.com - that makes jewelry like this, and I love the pieces they make.  So, I decided to try it for myself.  Well, I finished the piece after much frustration and decided that working with tiny rings that spring off the pliers when least convenient is not for me.  I give Mike and Mikaela major kudos for being able to do this sort of work without going insane!

Simple earrings
I don't have pierced ears, so I rarely make earrings.  However, I love making items with my little wire jig board - it's so much fun trying all the different twists and turns and seeing how moving one peg just a tiny bit or wrapping the wire clockwise instead of counterclockwise can make a dramatic change to the look of the piece.  So, for my last piece, I made a simple set of earrings to have on hand for any occasion that might arise requiring a small gift.

Sunday, March 18, 2012

#70 - Photos worth displaying

When I look at my list of challenges, I see several recurring themes.  One is photography.  I've always been fascinated by pictures  - the ones my parents had in albums and slide reels growing up, the weird snapshots I took with my first 110 camera that I got for Christmas when I was in 5th grade, the moody ones that my sister Janet took while pursuing her art major in college...  

However, other than a 2 minute introduction (put the film here, press this button to take the shot, here's how to adjust the focus) to a totally manual 35mm SLR when I was editor of my high school yearbook, I've never had any sort of formal instruction.  I could tell that some of the photos I took were rotten and others better, but I didn't know why.  A few on each roll of film were what I considered good.  And, about every 5 rolls of film, I took something better than good - more or less by accident.  So, this goal was about finding 10 photos that I'd be proud to tell friends that I took. (I'm also working on a distance learning course in professional photography with the New York Institute of Photography to try to make my photos more consistently turn out the way that I want for goal #41).

When I started working on this goal, I purchased ten frames (8x10" size) in a neutral dull silver color to fill as I went.  When I was working on redoing my bathroom, I decided that was the perfect location to display my "frame-worthy" shots.  All ten frames are now full, and I will probably end up buying a few more frames (there's still some wall space) to put up.  I plan to switch photos in and out of the frames as my mood takes me (I've got eight extras right now that didn't quite make the cut).  And here's what's currently in the frames ...
Hyde Park rose - taken 10/16/10, London

Medieval staircase at V&A Museum - taken 10/16/10, London

St Paul's Cathedral - taken 10/15/10, London

The back side of the parliament buildings - taken 10/17/10, London

Steps to cabin - taken 4/29/11, near Burntside Lake

Sunset - taken 7/6/11, Burntside Lake

Senor Iguana - taken 2/18/12, Tulum

Jaguar siesta - taken 2/20/12, Xcaret

Lifeguard station just after sunrise - taken 2/17/12, Playa Del Carmen

Scarlet Macaw pair - taken 2/20/12, Xcaret

Plus one that isn't on the wall simply because I didn't like how it looked with the color of the frame.
Underground waterfall - taken 2/20/12, Xcaret

Saturday, April 23, 2011

#34 - It's happy hour somewhere, right?

Pussyfoot
Carrie Nation
When I originally thought of learning to make cocktails from memory, my purpose was to find several common drinks that I liked and learn what was in them.  I wanted to be able to order with some confidence when I went out with friends rather than sheepishly saying "oh, what she said sounds good; I'll have one of those."  Plus, it made me feel sophisticated to think that I could whip up a martini or sex on the beach for someone with a moment's notice.
Afterglow

Cinderella
However, then I got my glorious party idea (see the post previous to this one) and decided to actually learn the recipes so I could BE a bartender for a night.  Then I realized that not everyone invited would want an alcoholic beverage, so I added some mixed fruit juice drinks to my initial list.  I've scattered photos of the non-alcoholic drinks through this post ... since I could make and photograph all of them in a night and be able to drink them all after instead of pouring some rather expensive ingredients down the drain or getting smashed.  Finally, I decided that I should invent a drink for the party ... I ended up making up two and am still tweaking the proportions but both the Sexy Librarian (for those who like a potent drink) and the Bookworm (for the abstainers) will make their debuts at the party.  I thought that it would be easier to create drink recipes than cookie recipes; however, I'm finding that I know more about how cookie ingredients interact.  It's fun though!
Yellowjacket

Wavebender
Shirley Temple
I can now reliably recite the ingredients, correct glass, and mixing procedure for over 15 drinks.  I've been making them one every few nights, so that I know how they taste as well.  So ... what will the guests be able to order from the bar in addition to the drinks pictured in this post?  The Bluebird, Fuzzy Navel, Icy Dog, Long Island Iced Tea, a classic Martini, The Monk, Rum & Coke, Rum & Ginger, Screwdriver, Sex on the Beach, Strawberry Whip, Tequila Sunrise, White Wine Spritzer, or a William Tell.  Or, of course, the aforementioned, Bookworm and Sexy Librarian!

Friday, November 12, 2010

#14 - Under the woodstove

One of the big selling points of this house when I was looking to buy a home was the glorious woodstove in the living room.  The previous owners had it professionally installed, but they planned to finish the tiling underneath themselves.  Like many other projects, it still wasn't completed when ownership transferred to me.  I added it to my house projects list; however, things like updating the electrical wiring took priority over cosmetics.  The good part was that the fireproof pad for tile was already in, so I could have a fire without the tile being in.
My starting point ...

I had planned on using ceramic tile and making some sort of mosaic out of odds and ends.  However, when I went to Color Tile earlier this week, the ceramic tile they had in stock was almost all beige.  Beige is not my thing ... after years of white and off-white in apartments, I want to use colors in my home.  I wandered through the corners though and found some great stone pieces to work with.  There were even a few triangle pieces already cut that would help in the odd corners of my mat.  The price was right too at $2 per 12" square since I was shopping through their remainders.
Deciding how to lay out the tiles

I didn't have a specific pattern as I worked, but just worked things in.  One of the pieces I bought was much larger than the rest.  I had originally planned to center it under the stove, so it wouldn't be so hard to reach under and lay in smaller pieces, but I liked it so much that I kept sliding it around to see it.  One of the styles that had smaller pieces was hard to take apart, so I ended up using many of the same size squares.
All finished
I'm very happy with the result.  It really dresses up an area of the living room that was blah.  And now I think I'm going to go curl up with a book by the fire ... :)
Already in use

Saturday, September 4, 2010

#62 - Mutant Pepper Jelly

When I put this goal on the list, I was thinking more along the lines of salsa; however ...

This was the year of peppers for my garden.  I'm not quite sure why I kept planting them, but I ended up with 10 different varieties - sweet bell, banana, jalapeno, chilies, etc.  Early in the summer, I had grand plans of making mango salsa with all the different varieties of bell peppers, but as the peppers grew ...

alarming things started to happen.  Look closely at the photos -- see it, the peppers crossbred -- basically, I ended up with multiple varieties growing from the same plant.  I still didn't think it would be so bad; they'd still taste like the variety they resembled, right?  WRONG!  After sampling one that looked like a bell pepper but had the heat of a jalapeno, I figured that trying any of them would be a gamble.  So, I started looking for ways to use them where not knowing the hotness would matter.

My brother (who has dealt with this same problem) suggested making pepper cornbread to feed to someone as a joke.  I did consider it, but my friend Lis had a better idea.  Yup, pepper jelly.

So, I spent my afternoon working with peppers and ended up with 28 beautiful jars of pepper jelly that ended up just hot enough to make your lips tingle but not run screaming in agony.  I decided to leave chopped bits of pepper in for interest ... this isn't the best photo, but trust me, it's gorgeous!

Sunday, August 22, 2010

#11a - Wild Rice

Okay, so this wasn't on my list, but mostly because I didn't think of doing it.

Yesterday evening, I got a call from my friend Amanda asking if I wanted to go ricing.  Wild rice season opened last week in Minnesota, and she was curious to give it a try.  I said sure - as long as she recognized the fact that canoes are not always my friends.  She said that she would paddle (or pole if necessary) if I would do the actual harvesting.

The procedure is fairly simple - one person poles or paddles the boat through the rice, and the other uses sticks called knockers to get the rice to fall onto a tarp inside the boat.  Check out this video for a visual example:


We set off this morning to get to our chosen spot just at 9 am (when the ricing hours start).  Setting up the canoe was easy, and there was lots of rice on the river.  It took me a few minutes to get the hang of bending and knocking the rice stems.  I have no comparison for the motion, but I will say that Amanda could paddle faster than I could keep up with the knocking.  I mentally thanked Peter (who had given me some advice the night before) for suggesting long pants tucked into socks.  The rice has a very itchy beard and hosts a wide array of insects and spiders.  The rice seemed pretty green, so after trying a few different sections to test ripeness, we turned the ricing experiment into a simple paddle.

Will I go out again?  Probably, it would be fun to get a big haul and was a pleasant way to spend the morning.

Thursday, August 19, 2010

#11 - Solo kayaking

When I was in 6th grade, I fell through the ice ... obviously, I made it back out (without assistance as no one was nearby), but since then I've had a hard time feeling relaxed in water.  Boat trips are spent watching the closest shoreline.  Friends have tried to teach me to swim with only slight success.  I start to consider walking on ice when other people are happily driving their half ton pickups across it.  It's somewhat ironic considering that I'm currently living in an area with abundant water recreation opportunities.

However, I truly do want to enjoy myself on the lake somehow.  So, earlier this year, when one of my friends suggested kayaking, I said yes.  And I loved it - except for some twinges of "it's going to tip over and I'll die" whenever a power boat zipped by.  The quiet feeling of gliding along with gorgeous scenery ... what's not to like about that ... it must be what swans feel like.  But, I held close to the safety blanket of being out with someone else as if that made any difference when we were in separate kayaks.

So, this challenge was all about proving to myself that the water gods would not reach up and pull me under the moment that someone else was not just a few feet away.  So, off I went ...
First, there was getting the kayak in the water.  Note that I was not thinking ahead about getting in when I stuck the paddle on the seat ... sorry, but you don't get to see the awkward photos of how I dealt with that!  Then one last longing look at the shore.

And, off I went ... watching closely for other watercraft.

Meanwhile, my friends were entertaining a visitor on shore ...
Sascha is a young fox who has discovered a good thing in the form of my friend Nina (who has been known to rescue baby turtles that fall from the sky).  He is definitely still wild but will gladly stand still for a photo op in return for, say, a piece of cheap hot dog.
Or, maybe do more that just stand still ... those hot dogs are good!

I was still making my way back from the other side of Indian Island at that point.  Though my goal was only to go around one island, I went around three (one very small) and came back up the shoreline.

But Sascha stayed long enough for me to watch him from the water.


Back to shore ... safely ... big sigh of relief!
Many thanks to my friend Nina for introducing me to kayaking, taking these photos, and much, much more!

Tuesday, August 17, 2010

#89 - The desk lamp

I am very excited to have one goal accomplished!

Several months ago, I started having troubles with the desk lamp that I use by my bedside for reading -- little flickers when I turned it on, having to work the switch a couple of times, etc.  One day, it just wouldn't turn on at all; I unplugged it and pondered the situation.  This is a lamp that I am very attached to because I knew my father had made it as a gift for his mother in the 1940s.  However, I know next to nothing about electrical wiring beyond unplug and check the circuit breaker.  I was determined to fix it though because of the family history.

Last week, I brought the lamp along to the farm when I visited my parents and asked Dad what could be done.  He showed me how to take various bits apart, and we decided that the problem was most likely in the socket.  In the process, I learned a bit more history relating to this lamp.  It's made out of honey locust wood and started it's life on the farm that my father's aunt and uncle owned in Indiana as a fencepost.  My dad brought it back on a visit in the 1940s and using a lathe turned out the shape and added a few brass bits from leftover farm machinery.  I think that I am now classifying it as one of my family heirlooms.

Dad suggested that I leave it with him, and he'd fix it for me before I visited next.  As kind as that offer was, I was working on my 101 list and thought "hmmm....never done anything electrical before -- perhaps that could be added to the list and I'd gain the start of a new life skill".  So, I put it back together and brought it home.  Tonight, I tackled the project, and it went pretty slick.  I'm even thinking about making a bottle lamp of my own since I saw wiring kits in the hardware store ...

Wanna see ...